Bright Field
Parts
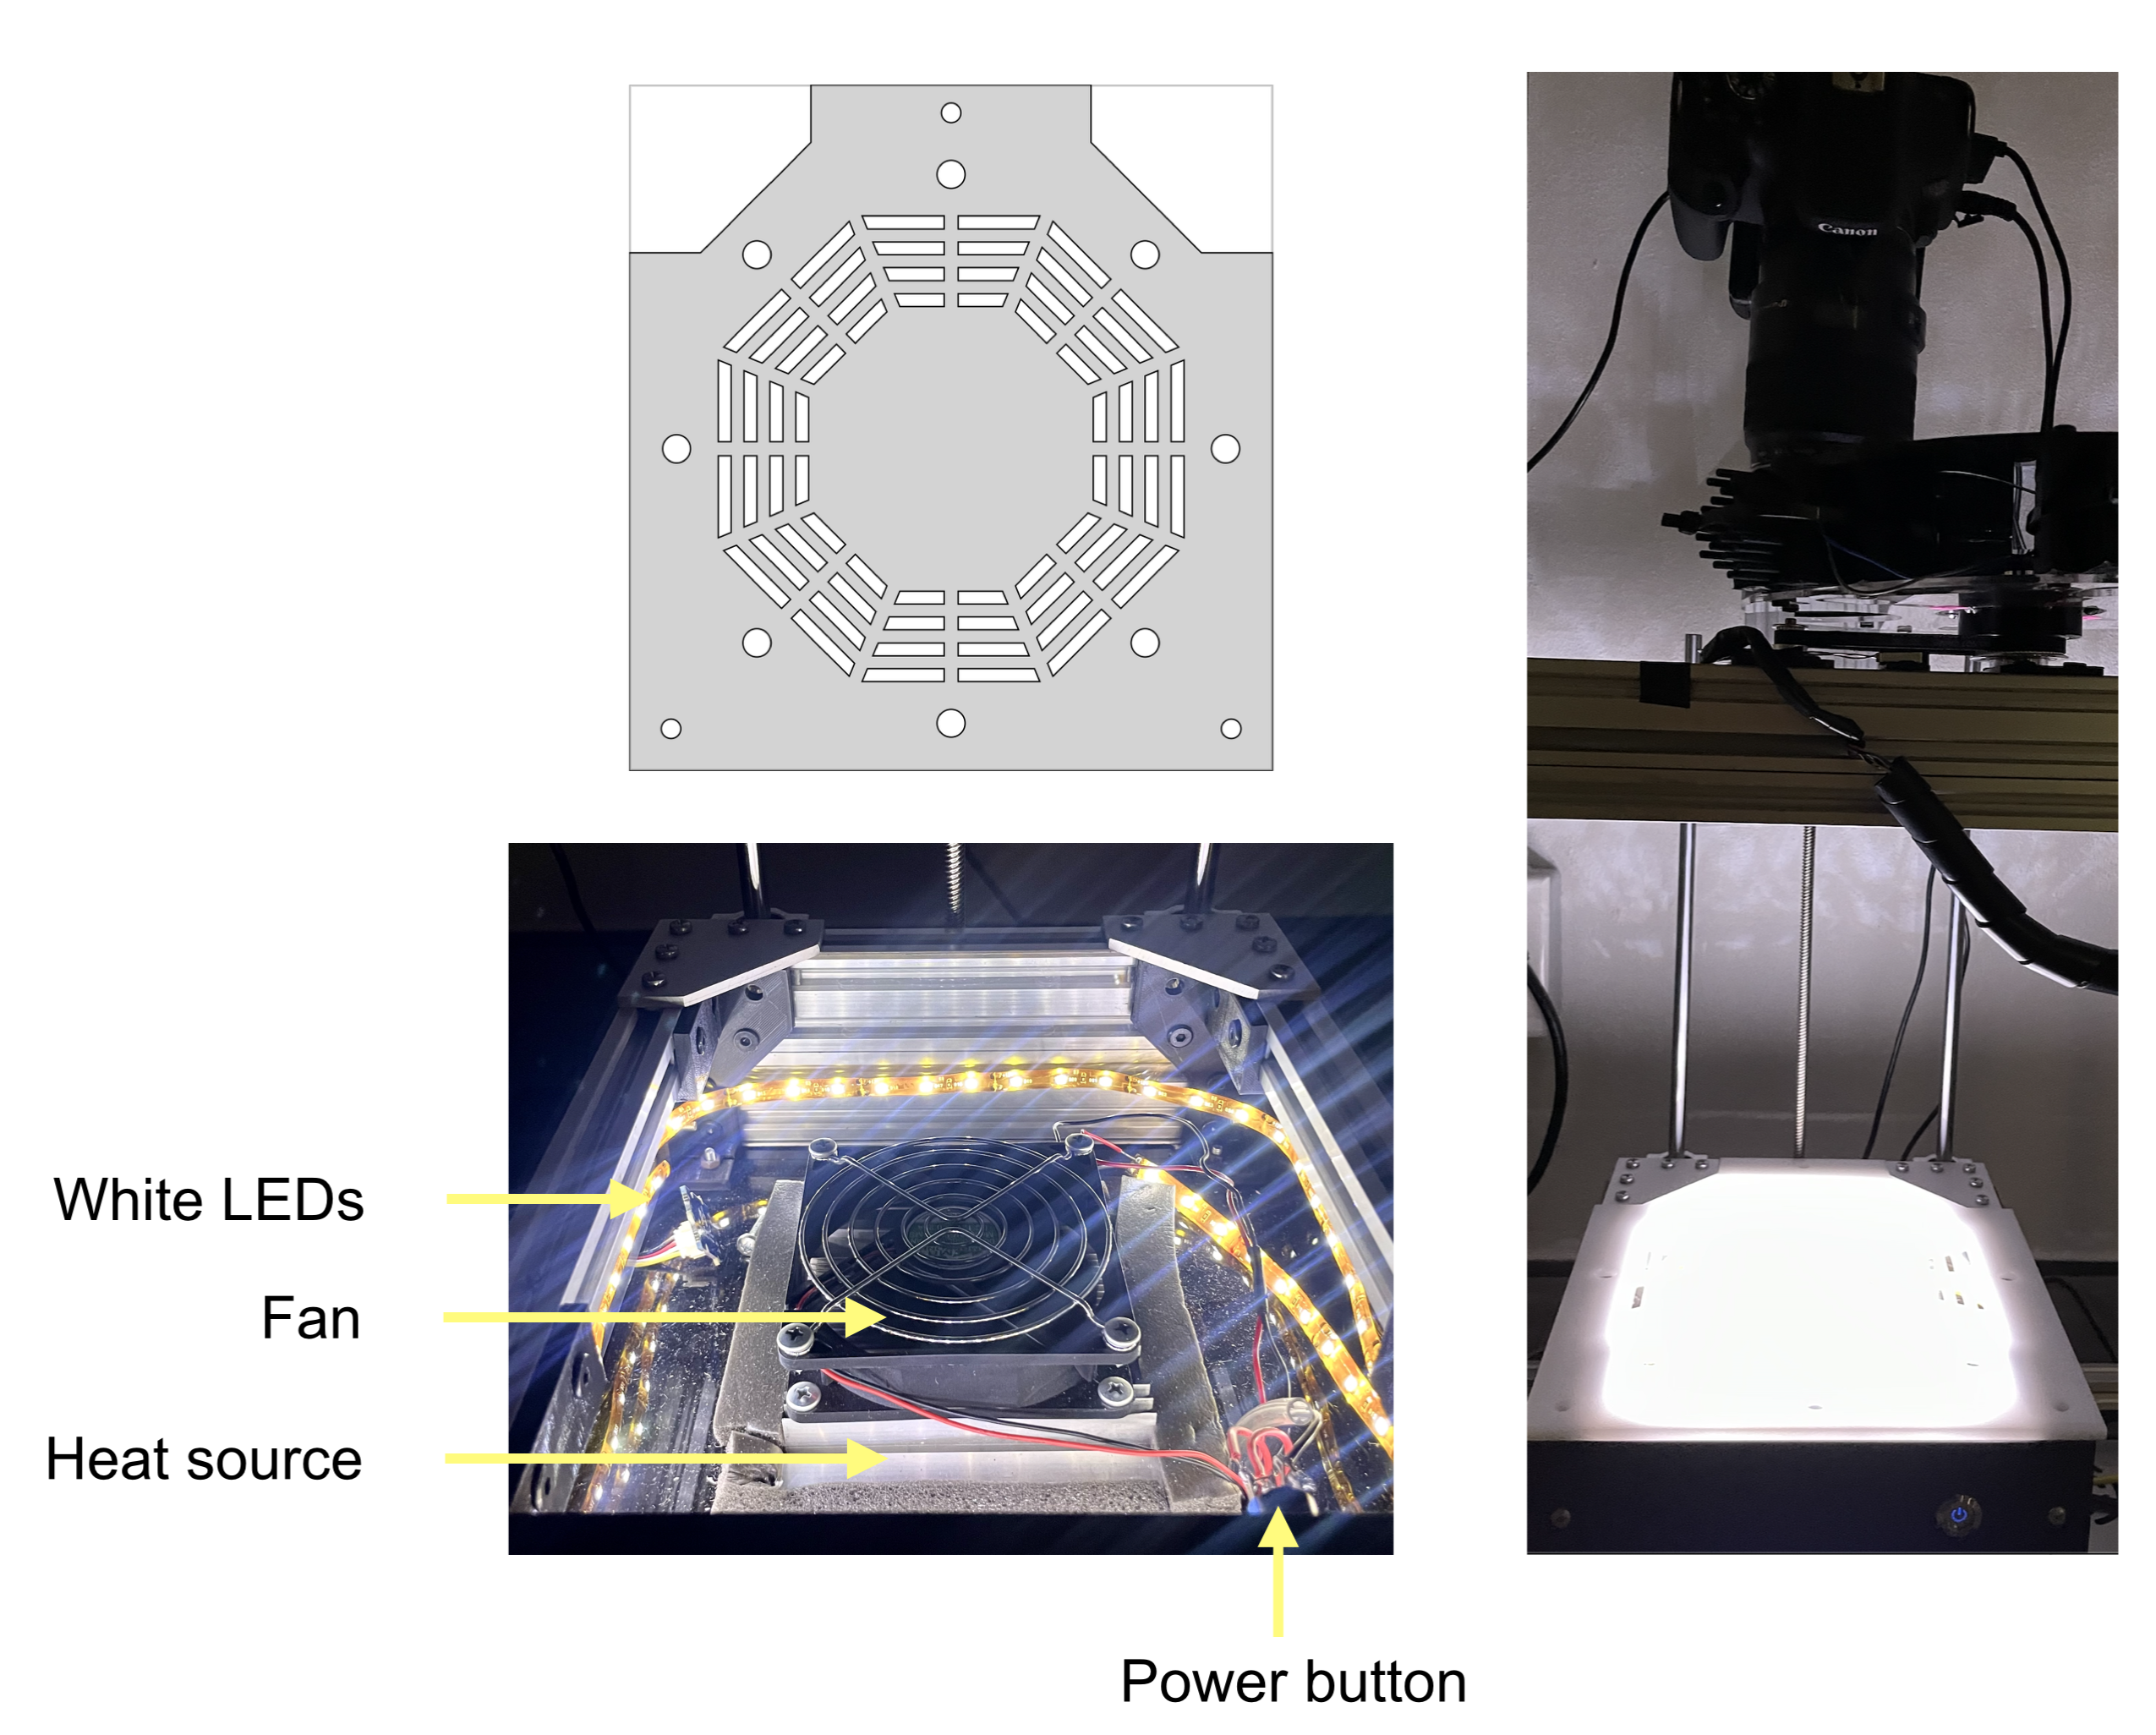
For the bright field setup, we use standard white LED non-addressable fixtures which are situated under the semi-transparent acrylic plate that holds the sample.
Step 1: Build box
- The incubation box is made of 5mm acrylic attached to a V-slot frame through 3D-printed joints.

-
First, build incubator frame by attaching the [OpenBuilds V-Slot 20x40x200 Linear Rail] with [OpenBuilds V-Slot 20x40x200 Linear Rail] using two [90 Degree Joining Plates] (illustrated in blue above).
-
Then 3D print corners (shown in yellow) using the following STL files:
Download STL/baffle_incubator_backLeft.stl
Download STL/baffle_incubator_frontLeft.stl
Download STL/baffle_incubator_frontRight.stl
- Cut acrylic for case (in red) using black 5mm acrylic using the following SVG files:
Download SVG/baffle_incubator_acrylicBack.svg
Download SVG/baffle_incubator_acrylicBottom.svg
Download SVG/baffle_incubator_acrylicFront.svg
Download SVG/baffle_incubator_acrylicLeft.svg
Download SVG/baffle_incubator_acrylicRight.svg
Download SVG/baffle_incubator_acrylicTop.svg
Note
The top acrylic can be switched between black, for dark field shooting, and semi transparent white, to be used when performing bright field shooting together with the white LEDs inside the box.
Step 2: Install incubator
-
In order to maintain temperature in ideal conditions for bacterial growth (usually 30C or 37C), we use an Arduino-based Arduino Mega2560 + Shield thermostat build around a Grove - Mega Shield v1.2 system that controls a temperature and humidity sensor Grove - Temperature&Humidity Sensor. The Peltier module attached to a Heat dissipator is controlled using a 5v Relay Module 1 Channel 12vdc.
-
Hot air is introduced into the incubation chamber through a 8cm fan.
Caution
The peltier module used for the air heating can be very hot.
Step 3: Install White LEDs
